Hesitant Entrances
Hesitant entrances (some people call it “locking up”) are fairly common among trombonists; if you have struggled with this issue, you are not alone. Fixing this problem as soon as it arises is important because a hesitation can evolve into something far more serious if left untreated.
I have used the following stepwise process to help some people recover from hesitant entrances. Of course, there is no way to guarantee success and there are many individual variables which may affect the outcome, but at least the following steps will give you a starting point.
1. Blow no tongue and no sound – “circular blowing”
This step is designed to cultivate an unwavering trust in the air flow.
Without using the tongue, worrying about coming in on time or even making a sound, move a generous amount of air through the instrument. Do this until you are consistently blowing through the trombone with no hitch and no hesitation before the exhale. Cultivate a rhythm so the exhale lasts roughly twice as long as the inhale and exaggerate the amount of air moving through the trombone.
I call this step “circular blowing” because there is no hesitation in the blowing cycle; do not hold your breath after you inhale and don’t hesitate to breathe in after you exhale.
Just a reminder: NO TONGUE.
2. Blow no tongue and let sound happen if it wants to – “the three blows”
Now organize your blowing into sets of three: for the first two blows, repeat step one. For blow number three, allow your lips to accidentally get in the way of the air flow. You may get a loud blat on no pitch in particular (that’s perfectly fine) or you may get no sound at all (that’s perfectly fine too, for now). Do not shy away from blowing lots of air and do not change the rhythm and pacing of the blowing you established in step one. Make your blowing cycle circular and make the exhale roughly twice as long as the inhale.
Repeat this step until you are able to create sound from the beginning of blow number three. Take your time in accomplishing this because you don’t want to feel obligated to create sound. You should feel as though you are allowing sound to occur – not making sound occur. Just a reminder: there is still NO TONGUE during this step.
I call this step “the three blows” because it embodies the right proportion of air to chops. It’s 2/3 air and 1/3 chops; this proportion represents a healthy approach to playing.
3. Add the tongue, but articulate in a different place than you usually do
Think about where your tongue would normally touch when you articulate. For most people, it’s about where the teeth intersect with the roof of the mouth. Before you begin this step, experiment with this tongue placement and clarify where your normal default placement is.
Now change it. It can be a subtle change but it must be conscious and it must be noticeable to you. Perhaps you will touch on the teeth or on the roof of your mouth; you may even move the tongue off to one side or the other. Do not concern yourself with how this change would affect the sound of the articulation and don’t worry that it feels odd or awkward to you.
Now try the three blows and tongue each blow using the new tongue placement.When you articulate, imagine the tongue is a speed boat bouncing off the water and the water is the air flow. The tongue does not stop the air – it DENTS the air. The tongue does not start the air because the air is pre-existing from the other two steps. The tongue is subordinate to the air; without the air, the tongue will not function.
As you do this step, here are some tips to remember:
- You are not obligated to make sound. If sound comes out, great, but if not, no worries.
- Keep circular blowing; there is never a hesitation in the blowing cycle.
- Tongue every blow – even the first two with no sound.
- Always use the new tongue placement.
If you are still locking up, try yet a different tongue placement. Be radical in your experimentation because you never know what might work.
The new tongue placement is your new default. Once you are able to articulate and come in on time, work with the new tongue placement until it feels more natural to you and sounds like you want it to sound.
One last bit of advice: Don’t rush through the steps and be brutally honest about your progress. These three simple steps might take you a couple of days or they might take weeks…everybody’s different. You may need to suspend your regular practicing until you fix this problem; if you are in this situation, be patient with yourself and give yourself the time you need to “reprogram” your approach.
If you would like additional help, feel free to request a zoom lesson with me.
Here are some additional resources to help you with hesitant entrances:

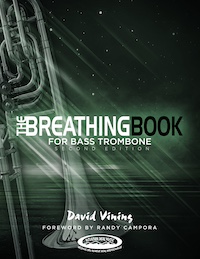
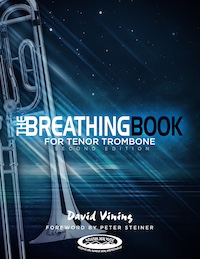
 Breathing is one of the most important fundamental skills for trombone playing because it provides the foundation for many of our other fundamentals including tone, articulation, range, endurance, intonation, flexibility, and phrasing. If you want to improve one of these important musical attributes, start by improving your breathing. The Breathing Book is a blended textbook and method book—it contains information about breathing and activities designed to help you use the knowledge as you play trombone. The Breathing Book is not an exercise book—it’s a “learn how to move” book and includes videos for some of the chapters and movements to clarify the content. The Breathing Book explores all the individual movements of breathing and, in the end, will help you coalesce them into a singular, well-coordinated, and organic motion.
Purchase The Breathing Book for Tenor Trombone
Purchase the Breathing Book for Bass Trombone
 What Every Trombonist Needs to Know About the Body applies anatomically accurate information to playing the trombone—for example, the arm and slide technique, breathing and tone production, the tongue and articulation, etc. By teaching from a position of anatomical accuracy, this book provides a secure somatic foundation upon which to make music, thereby making your movements free of tension and reducing your risk of injury. The result is a beautiful tone, improved technique, and minimum effort in your playing.
Purchase What Every Trombonist Needs to Know About the Body
Here are 2 more resources that may be of help if you are experiencing difficulties:
